Antietam’s Lower Field Revisited Part III: A Flawed Advance
General McClellan assigned the Ninth Corps, on the army’s left flank, the role of seizing the Rohrbach Bridge and creating a diversion to support the main attack on the Confederates to the north. The unsupported Ninth Corps had a difficult task in taking the bridge; made more so by the courage of a few hundred Georgians. Challenging terrain and an ideally defendable position account for much of the difficulty in taking the bridge. Historians who merely look at the disparity in manpower are missing critical points. Yet numbers alone do not tell the story, for all of the Confederate troops involved were veterans, and many of the Union regiments were untested. The poor Federal performance can also be partially attributed to an inefficient command structure of the Ninth Corps and McClellan’s lack of support for them, as well as difficult terrain which favored the defender and made massed attack difficult, and poor coordination for the final assault that afternoon.
There were also simply not enough Union troops on this part of the field. The roughly 13,000 men of the Ninth Corps were not enough to attack and occupy the ground assigned to them. Compared to the upper parts of the battlefield, the Ninth Corps was being asked to advance and occupy an area that two corps or more would do elsewhere.
By the time the bridge was secured, two divisions had been involved in the fighting, leaving the subsequent advance on Sharpsburg to the other two divisions. The two that had been attacking the bridge in the morning were held in reserve.
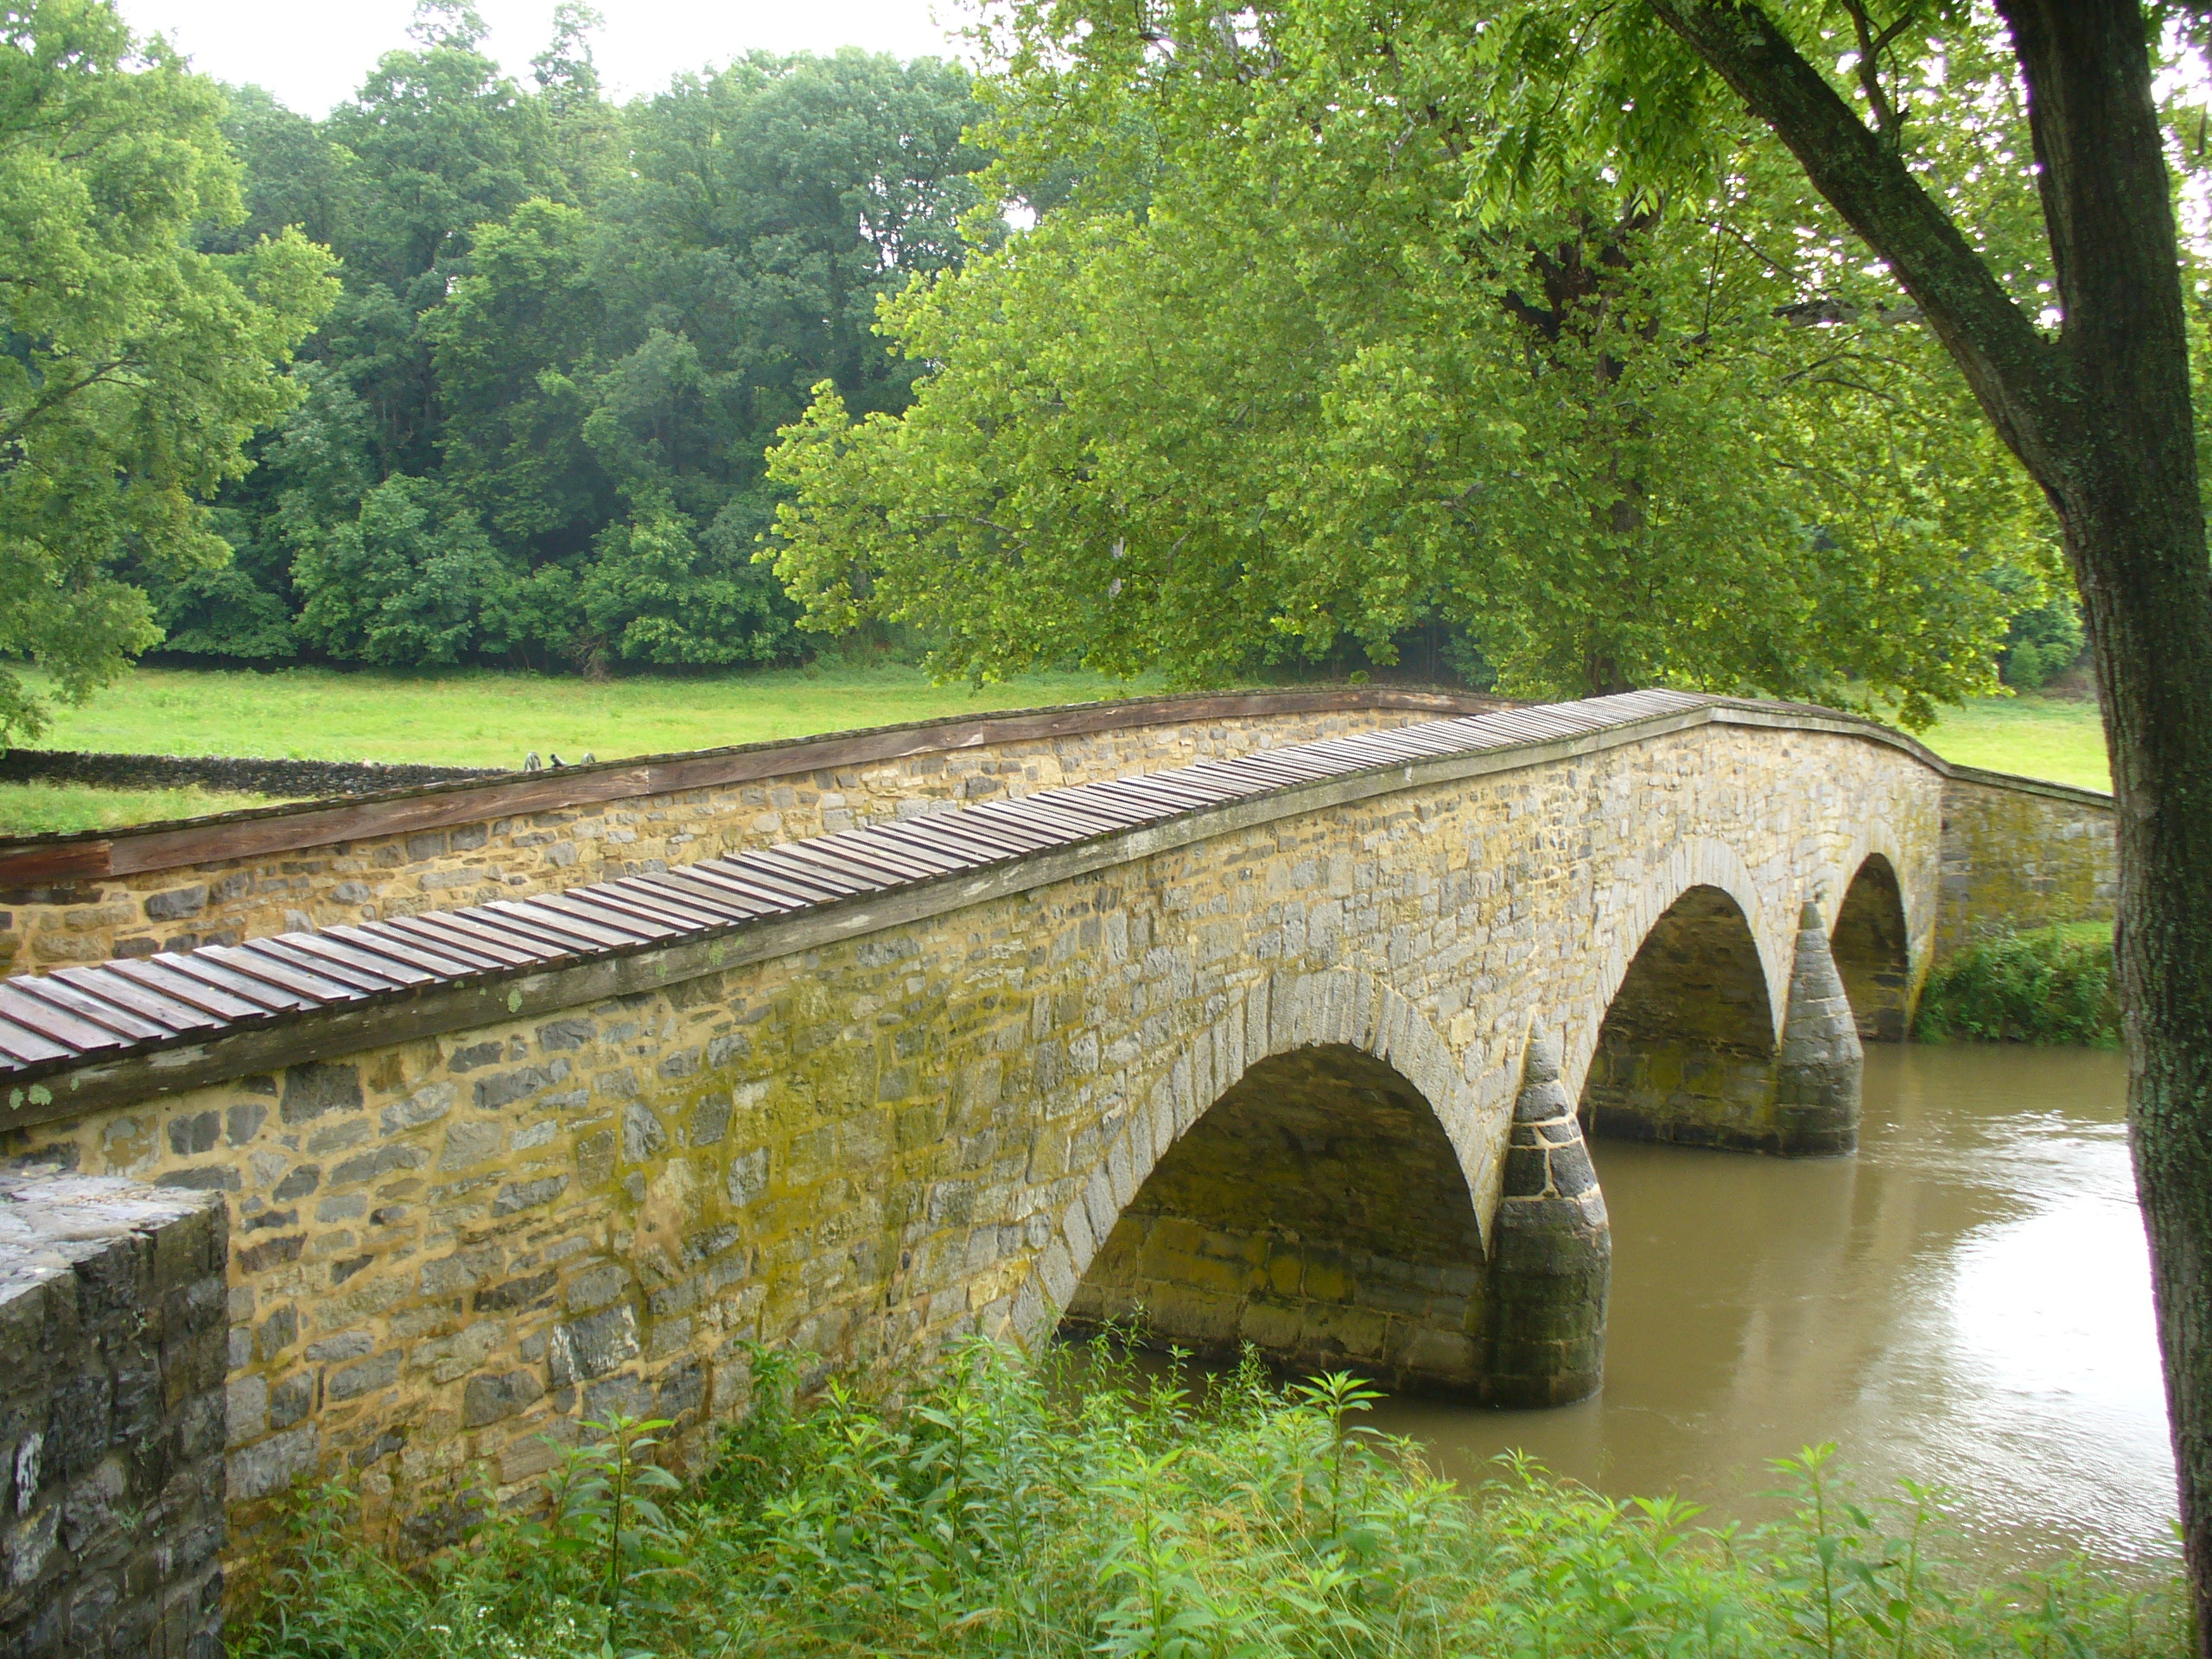
The bridge was secured around one o’clock, at about the same time that troops forded Antietam Creek downstream at Snavely’s Ford. By the time the two fresh divisions crossed the creek, deployed, and prepared to advance, it was around three o’clock. The single-lane bridge and narrow road on either side of it made moving troops, ammunition, and supplies time consuming.
Once the advance got underway problems developed immediately. Confederate artillery fire was intense, and accounts from across the field note its strength and accuracy. With two divisions of two brigades advancing, four brigades were deployed to cover an area nearly a mile wide.
None advanced in tandem, partially as a result of the hilly terrain which impeded movement and blocked vision, but also a result of tenacious Confederate defenders. Southern units used the difficult agricultural landscape of the Otto and Sherrick farms (including structures, orchards, and stone walls) to contest the Union advance on the road directly leading to Sharpsburg.
To the left, or south, the brigades of Colonel Edward Harland and Colonel Harrison Fairchild also advanced unevenly. In fact, two units, the 9th New York (Hawkins’ Zouaves) and the 8th Connecticut ended up too far in advance from their support. Attempting to bring up the rest of Harland’s brigade, division commander General Isaac Rodman was killed.
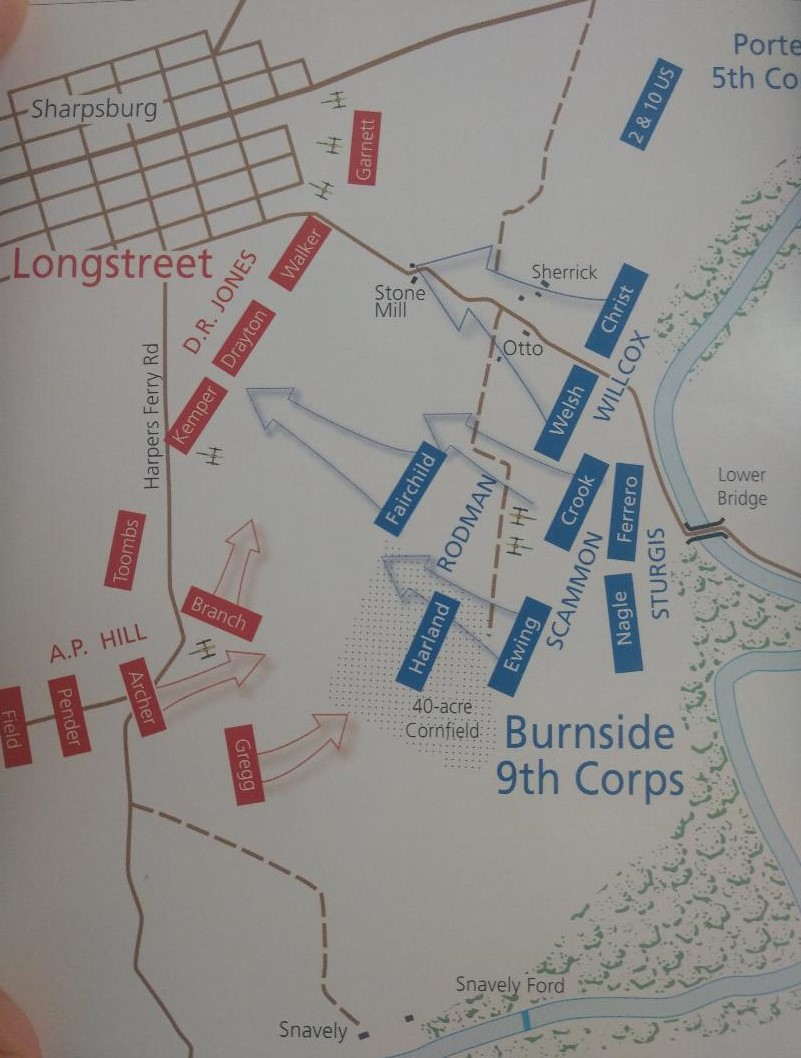
While it easy to second guess and criticize from a modern perspective, there seems to be plenty of blame to go around. Division commanders Orlando Wilcox and Rodman could have tried to better coordinate their advance. Generals Jacob Cox and Ambrose Burnside could have also overseen the operation better and sent staff officers to ensure communication and coordination. The result was the advance was spread over too wide a front, and no account was made for inexperienced units. For example, the rookie 16th Connecticut ended up on the left flank, nearly alone, with disastrous results. Difficult terrain that had not been scouted was also a major factor.
By around 4:30, inexperience, confusion, and terrain challenges were undermining the advance. Combined with the usual challenges that go with forming and deploying troops, even under good conditions, the Ninth Corps was in trouble. Lead units were advancing far in front on widely dispersed trajectories: the 8th Connecticut, 9th New York, 89th New York, and 103rd New York were all out in front, but none were in support of each other. Nor were there any reserves close enough to help.

Although the Ninth Corps faced severely understrength units of General D.R. Jones’s Division, it was not enough to decisively drive them back or withstand the arrival of General A.P. Hill’s reinforcements (only three of Hill’s brigades got into the battle). The two left-most units on the line, the 4th Rhode Island and 16th Connecticut, were thrown into confusion by the Confederates who fired on them- some in captured Union uniforms taken at Harpers Ferry (how many wore blue remains unclear).
Fortunately, reserves were close at hand. Colonel Hugh Ewing’s brigade of the Kanawha Division advanced to plug the gap created when Harland’s troops fell back. These three relatively untested Ohio regiments advanced against A.P. Hill’s newly arrived troops. As with the New Englanders earlier, they mistook the South Carolinians for Union troops when the saw them in blue. Ewing’s men defended a stone wall briefly but were unable to endure the enemy’s fire and fell back. The rest of the Ninth Corps fell back to the high ground near the bridge. Soon it was getting dark.
For the Army of the Potomac, the Ninth Corp’s final attack was a lost opportunity, made so by a muddled command structure, inexperienced units, timid commanders, a determined enemy, and difficult terrain.
The author thanks Kevin Pawlak for his advice and input.
thank you for the very clear explanation, helpful map and demonstrative photo. I plan to visit Antietam on June 16, armed with this great information. My past two trips focused on the Northern fields with insufficient and uninformed attention to the late afternoon fighting in the Souther half.
I recommend taking the Final Attack Trail, near Burnside’s Bridge. You’ll see first hand the area we’re talking about here.
Good stuff, Bert. The advance and retreat is a blog series in itself.